Overview
This document will outline the integration of QuickBooks Online (QBO) and Decor Fusion.
Important Notes
· QBO will link to Decor Fusion GL Accounts via the Account Name. They are case-sensitive.
· Decor Fusion does not support multicurrency. This means that every transaction is sent over to QBO with the currency used in Decor Fusion. Purchase Journals cannot be sent over to any supplier/vendors whose currency does not match the currency used in Decor Fusion.
· The ampersand character ‘&’ is a reserved character in the QuickBooks Online API and therefore cannot be used in the name field for Accounts, Classes, Tax Codes, Terms, and Vendors.
· QBO supports classes with a maximum length of 100 characters, but Decor Fusion only supports a length of 50 characters for QuickBooks classes. To see how to turn on Class tracking, see Appendix 1.
· QuickBooks Online Integration from Decor Fusion will require the Microsoft Edge WebView2 runtimes. Windows 11 has it built into it. Windows 10 had it added via Windows Updates. See Appendix 4.
- Make sure to switch to Accountant view in Quickbooks so that menu options line up with this document.
Setup
· You will need to create a ‘Decor Accounts Receivables’ account in QBO of type‘Current Asset’ and detail type of ‘Other Current Assets’. Decor Fusion cannot post Journal Entries to a QBO account of type ’Accounts Receivable(A/R)’. The name of this Account must match the name of the Decor Fusion Accounts Receivable GL Account.
· If you are using AP Clearing, you will need to create an AP Clearing account of type ‘Other Current Liabilities’ and detail type of ‘Other Current Liabilities’.
· Make sure your GL Account Names match their corresponding QBO account name. Remember that they are case-sensitive. You can find the GL Accounts in QBO by mousing over the ‘Accounting’ option in the left menu and clicking the ‘Chart of accounts’ option.
· If you have multiple stores, you will need to setup classes in QBO. This is found by clicking the gear icon and under ‘Lists’ click ‘All lists’ and then click the ‘Classes’ option.
· If using the AP Vouchering feature in Decor Fusion to send purchase journals/bills to QBO, you will need to configure the following:
o Vendors. In Decor Fusion, open Vendor Maintenance and then select a vendor and click Properties button. On the properties tab, click ‘Export Vendor Bills’ and then copy the first 40 characters of the QBO Vendors/Suppliers ‘Company Name 'into the ‘AP Vendor Number’ field. To get to Vendors in QBO, click the Expenses option on the left-hand side and select Vendors (or Suppliers for QBO Canada). Click the new button to create a new Vendor. Note that QBO allows Company Names to have a length of up to 100 characters whereas Decor Fusion only supports up to 40 characters.

Fig. 1

Fig. 2
o Vendor Terms. Ensure that the Vendor Terms in Decor Fusion match those which are in QBO. The ‘Description’ field in Decor Fusion must match the ‘Name’ field in QBO. Terms are found in QBO by clicking the gear icon and under Lists click All lists and then click the Terms option.


Fig. 3 Fig. 4
o Tax Codes – Canada ONLY. If you pay tax on purchase orders, then the proper QBO Tax Code will need to be associated with the taxes GL Account in DecorFusion. This will enable the tax from the purchase order to show in the QBOTax Summary/Detail reports. Navigate to Edit>Software Settings>General Ledger. Select the tax account and click the ‘properties’ button. Make sure to check the ‘Tax Account’ checkbox and copy the QBO Tax Code into the‘Purchase Tax Code’ field. To find the tax codes in QBO, click the ‘Taxes’ option in the left menu. Then click ‘Manage sales tax’ in the top right.

Fig. 5
· Setup the Store(s) by navigating to Edit>Software Setting>Company and Stores>Stores and select the store and click the Properties button. Go to the GL Accounts tab and select ‘QuickBooks Online’ in the Application dropdown. If you have multiple stores, add the stores QBO class in the ‘Add’ field and select QuickBooks in the ‘Add As’ field. If this is the first store you are setting up, leave the ‘Same QuickBooks Online Company as Store’ field blank.

Fig.6
· If you have multiple stores, when setting up subsequent stores you will have the option to associate the store with an already configured store. You will want to do this if both stores are in the same QBO Company (most common). To do this, in the ‘Same QuickBooks Online Company as Store’ select a store name. InFig. 6, the South store is being set to use the same QBO Company as the one setup for the North store. If the field ‘Same QuickBooks Online Company as Store’ is left blank, then it is telling Decor Fusion that this store will use a different QBO Company than other stores.

Fig. 7
· Navigate to the ‘General Ledger’ screen within the Software Settings of Decor Fusion. Check to ensure that the account ‘Name’ in Decor Fusion matches the Account Name in QBO. To get to the Chart of Accounts in QBO, click on the ‘Accounting’ option on the left-hand side and select ‘Chart of Accounts’. This must be done for all the General Ledger accounts!

Fig. 8

Fig. 9
Authorization
When you attempt to perform your first push of data to QBO, you will be asked to authenticate with your QBO Company and give Decor Fusion authorization to communicate with it. As long as you are regularly sending GL Summary or AP Vouchers, you should not have to Authorize often. The authorization window will open and ask you to sign in with your QBO credentials. NOTE: The credentials used must have administrator rights in the QBO Company.
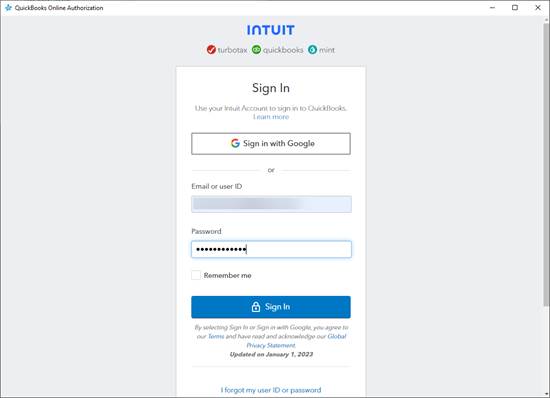
Fig. 10
Once you successfully enter your credentials, you will be asked to give ‘Decor Fusion Accounting Link’ access to your QBO Company. If you have multiple QBO Companies associated with the credentials used, they will display like in Fig. 9 and you will need to select the proper company and hit the ‘Next’ button. Once the authorization process is complete, the window will close.

Fig. 11
General Ledger Summary
The behavior of the General Ledger Summary report remains the same. The only caveat is the store filter. If all of your stores are handled within the same QBO Company, then you will be able to use the ‘All’ stores option. If you have different QBO Company for different stores in DecorFusion, then you will have to run the export feature store by store.
Once you select the store filter, you can then click the ‘Export’ button. You will get a dialog window which will outline how many account entries will be on the export and verify that you want to send the data to QBO as seen in Fig. 10.

Fig. 12
If successful, a dialog box will appear asking if you want to update the transaction closed date.

Fig. 13
If there are any errors, they will be displayed in a message as well as written to the system log.

Fig. 14
Purchase Journal
The Purchase Journal Reports behavior remains the same other than the Store filter. Like the GL Summary Report, if all your stores are not linked to the same QBO company then you will need to run the export feature store by store. The first step of the export process is to ensure all the accounts, classes, terms and vendors exist in QBO. If one is missing, then the process will stop with a dialog window outlining the errors which need to be resolved. Once it passes this step then it starts to process each purchase journal separately. If the process encounters an error in the middle of a batch, all successfully posted purchase journals will make up the new batch while all purchase journals from the erroneous purchase journal forward will remain unbatched until the error is resolved.
Once you select the desired reporting period, store, and any other filters, click the ‘Export’ button. A dialog window appears to give an overview of the operation about to be completed including a count of the bill(s) to be sent to QBO and the reporting period and asks you to verify that you want to send the data to QBO.

Fig. 15
If successful, a dialog box will appear stating the process was successful.

Fig. 16
If an error occurs, a dialog box will appear to denote the errors and which Vendor/Invoice number it errored on.

Fig 17
When re-exporting a previously exported batch, you will need to ensure that you select the proper store if you are using multiple QBO Companies. The store selection will denote which QBO Company the batch will be sent to.
Appendix1.
Enabling QBO Class Tracking
Click on the gear icon in the top right-hand corner of the QBO screen. Under ‘Your Company’ click ‘Account and settings’.

Fig. 18
Click the ‘Advanced’ option and then navigate to the Categories section. Expand the section. Toggle the slider beside ‘Track classes’ so it is green. From the ‘Assign classes’ dropdown, select ‘One to each row in a transaction’. Click Save button.

Fig. 19
Appendix2.
Modifying QBO Chart of Accounts, Classes, and Terms
Click on the gear icon in the top right-hand corner of the QBO screen. Under ‘Lists’ click ‘All lists’.

Fig. 20
The page will then show you the lists which you can modify. Select which list you want to modify.

Fig. 21
Appendix3.
QuickBooks Online Versions
| Users | GL Accounts | Classes and Locations | |
| Simple Start | 1 | 250 | N/A |
| Essentials | 3 | 250 | N/A |
| Plus | 5 | 250 | 40 |
| Advanced | 25 | Unlimited | Unlimited |
· Single stores could use Essential or higher edition.
· Any one client who has multiple stores and will run them out of the same QBO company will require Plus or Advanced editions as they support class tracking.
Appendix4.
Microsoft Edge WebView2
You can check if it is installed by going to Apps & Features and search for it.

Fig. 22
Download is available from https://developer.microsoft.com/en-us/microsoft-edge/webview2/#download-section
If you are installing on a Windows Server, you will need to open Command Prompt (CMD) as Administrator.
Then type the following:
C:\>change user /install
You can then install the runtime by running the installer.
Once done installing, type the following into the Command Prompt (CMD)
C:\> change user /execute