Overview
This document outlines how Decor Fusion works with Sage 50 Canadian (Simply Accounting).
Procedures
This document is split up into several sections to help with finding relevant information.
General Ledger Summary
In order to export the accounting data from Decor Fusion to Sage 50 Canadian, the General Ledger Accounts in Decor Fusion must match the Chart of Accounts in Sage 50. Please refer to the document titled General Ledger Setup in the Decor Fusion Knowledge Base to review the steps involved in setting up the General Ledger in Decor Fusion.
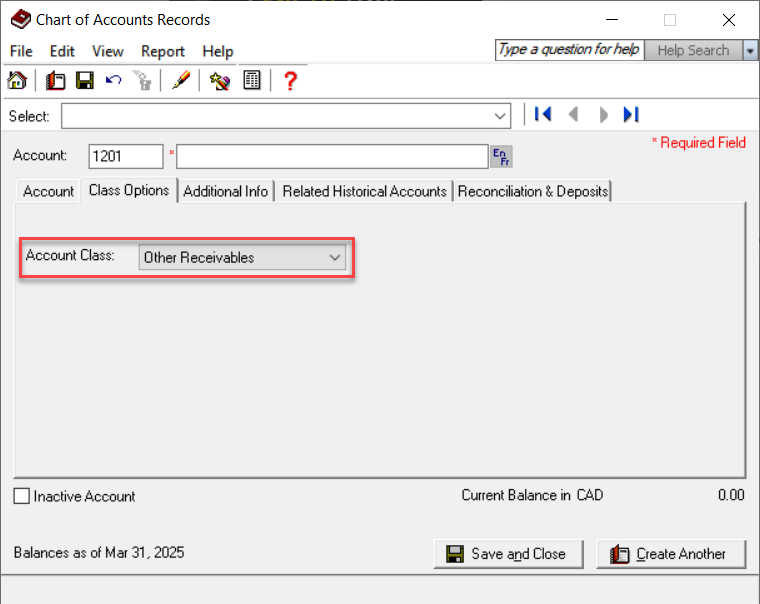
One notable change required for the import to work is to create a new Decor Fusion Accounts Receivable account in Sage 50 with the type of “Other Receivables”.
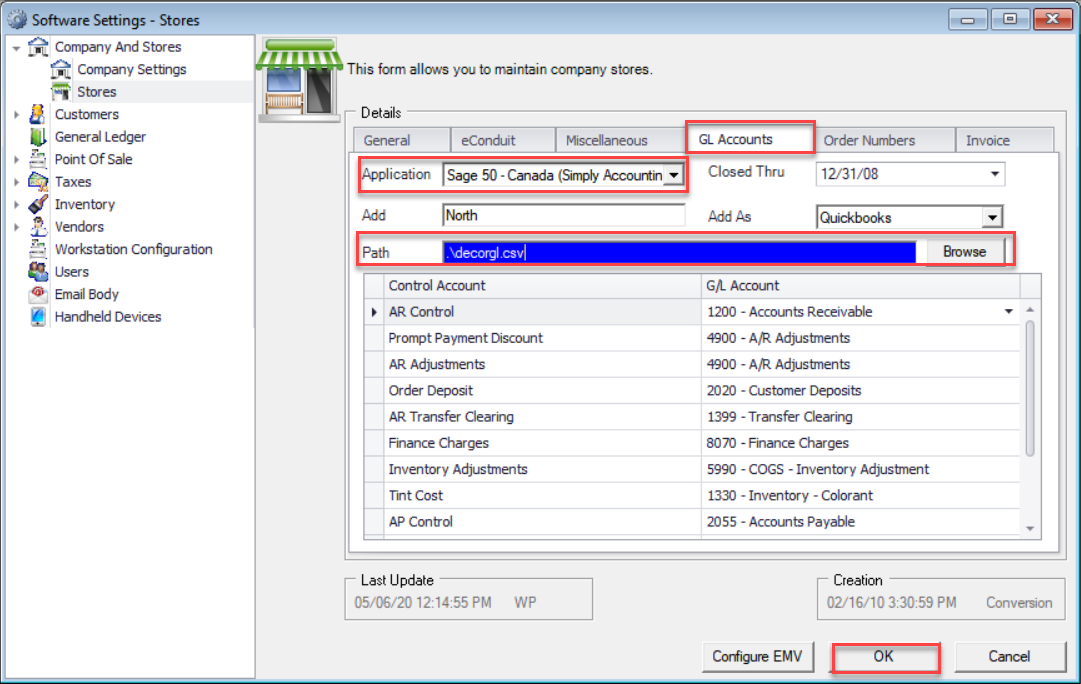
Click on the Edit menu and navigate to Software Settings and expand the Company and Stores section inside Decor Fusion. Click on Stores and highlight your store and click the Properties button. Click the GL Accounts tab. Set the Application to "Sage 50 - Simply Accounting)" and set the Path field to the directory in which the export files should be saved. Click the OK button.
Once this setup has been completed, navigate to the Reports menu and click Report Selector. Expand the Accounting Reports section and click the General Ledger Summary and press the Print button.
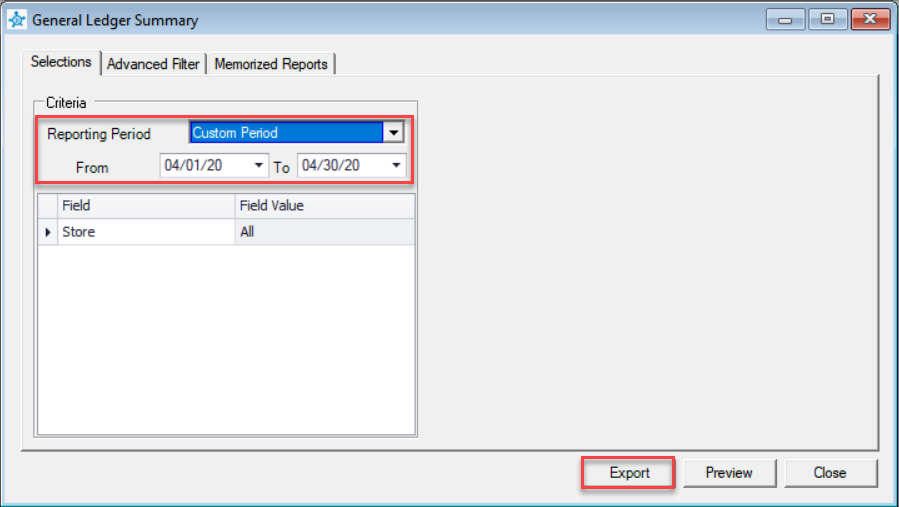
Select the desired Reporting Period (If a specific date range is required then select Custom Period) and click the Export Button.
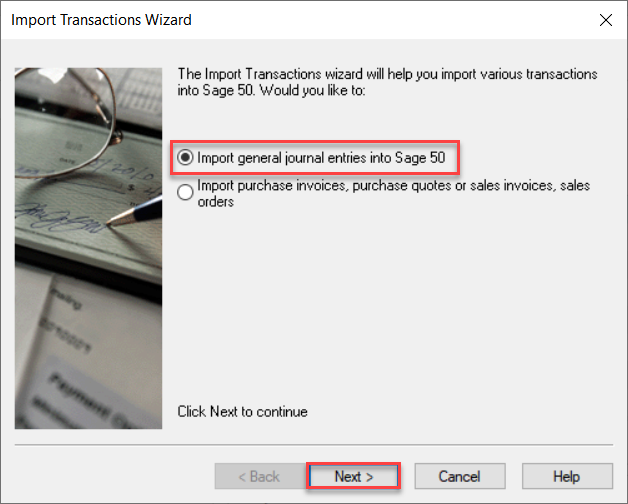
Open Sage 50 Canadian and click the File menu and select Import /Export option and then Import Transactions… Select the Import general journal entries into Sage 50 option and click the Next button.
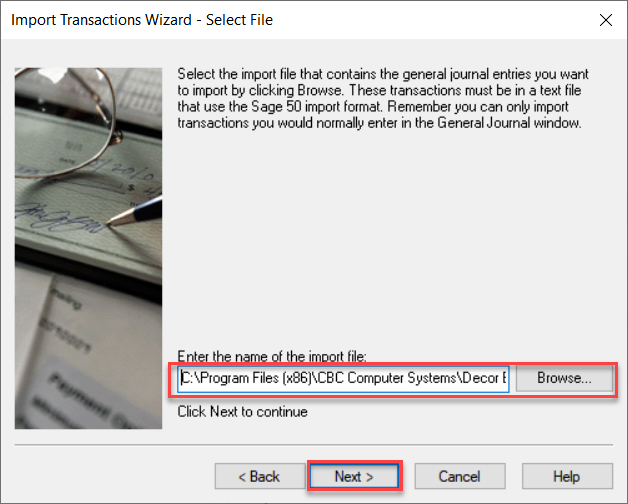
Click the Next button again. Select the file to import and click the Next button.
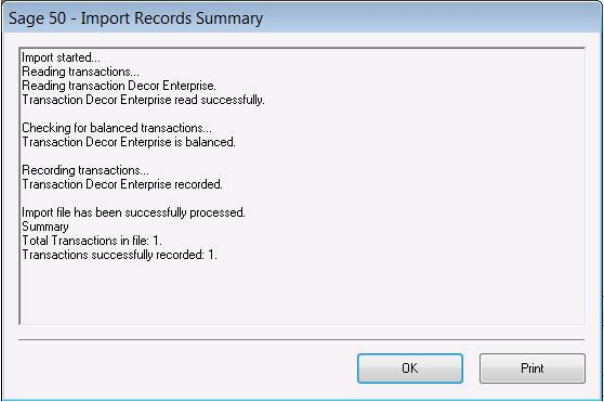
An Import Records Summary screen will appear. It will contain a log of the transaction which is importing. If a file fails to import,
the screen will contain information detailing why it was unsuccessful.
AP Voucher
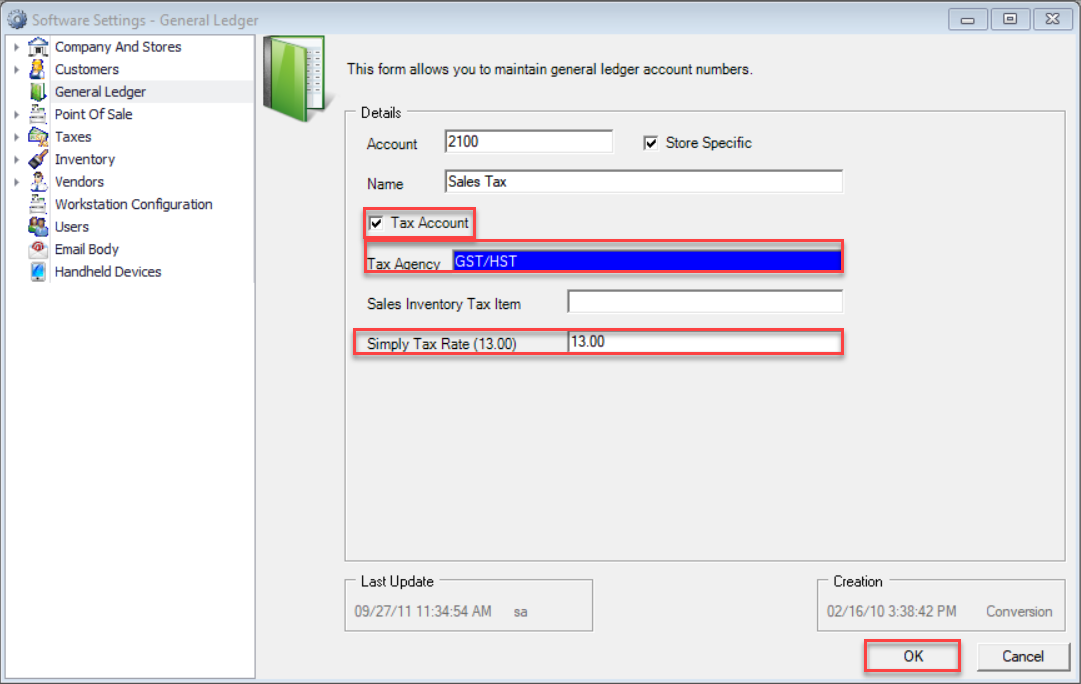
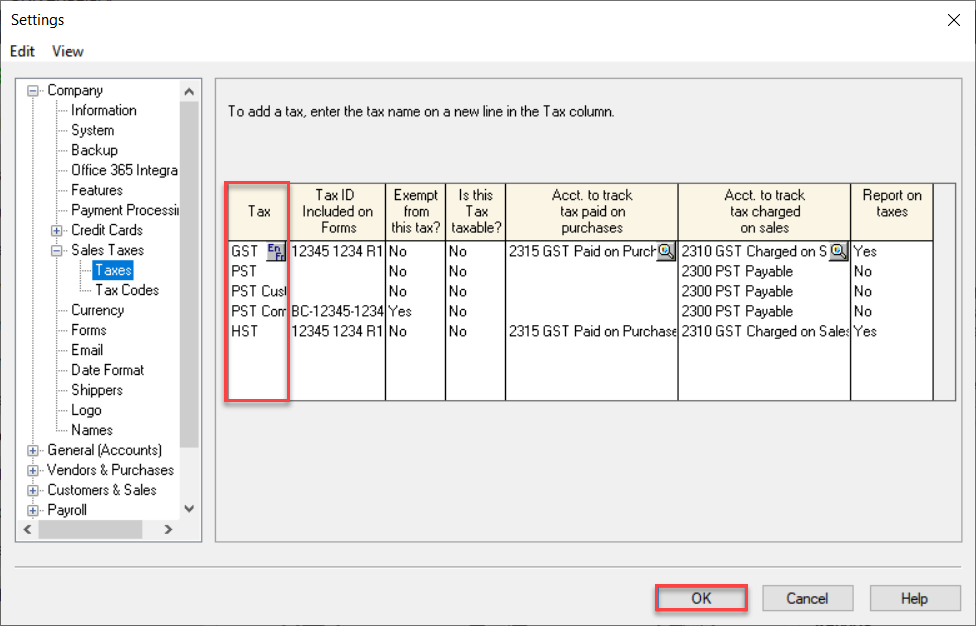
Decor Fusion’s AP Vouchering with Sage 50 Canadian requires some initial setup. The first step in the setup is the Sales Tax General Ledger account. Click the Edit menu and click Software Settings. then click General Ledger section. Find the Sales Tax GL account then hit the Properties button. Check the Tax Account checkbox. In the Tax Agency field fill in the tax name found in Sage 50 under the Setup menu then Settings, then Company, then Sales Tax, and finally Taxes. Enter in the Tax Rate used in the Simply Tax Rate (13.00) field. Click the OK button.
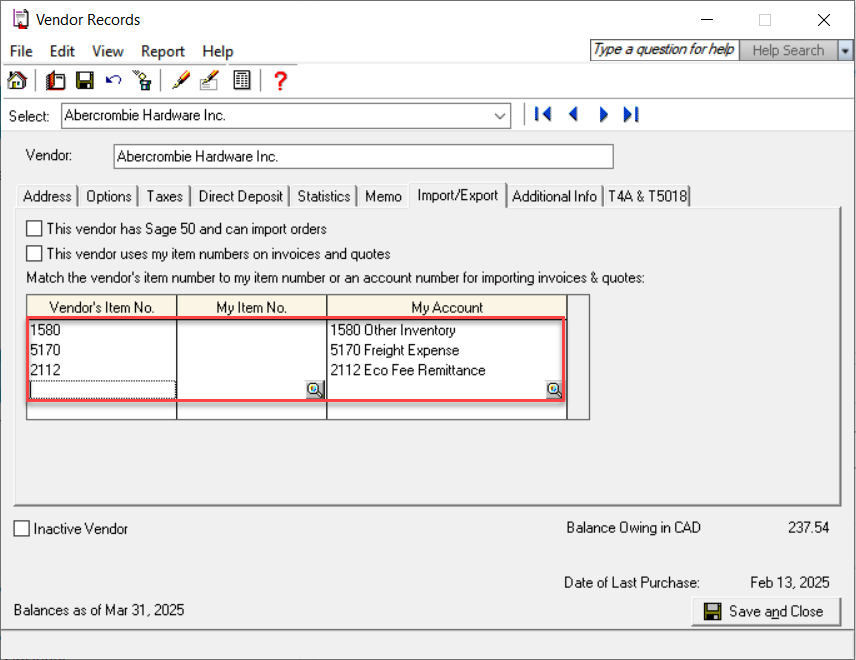
Each vendor in Sage 50 for which vouchers will be imported from Decor Fusion will require some setup. In Sage 50, select the Vendors & Purchases from the navigation pane on the left hand side. One by one, double click on your vendors and navigate to the Import/Export tab. The import requires that the Inventory Asset GL Account and any Vendor Footer Charges General Ledger Accounts which will be applicable to the selected Vendor to be added (E.g. Freight, Eco Fees, Discounts, etc). Enter the Decor Fusion GL Account Number into the Vendor’s Item No column and then select the Sage 50 Account under My Account. Click the Save and Close button when done.
Please refer to the document AP Clearing vs AP Vouchering in Decor Fusion in the Decor Fusion Knowledge Base to aid in the setup of Vendors and Footer Charges in Decor Fusion. This document will also outline the AP Vouchering procedure.
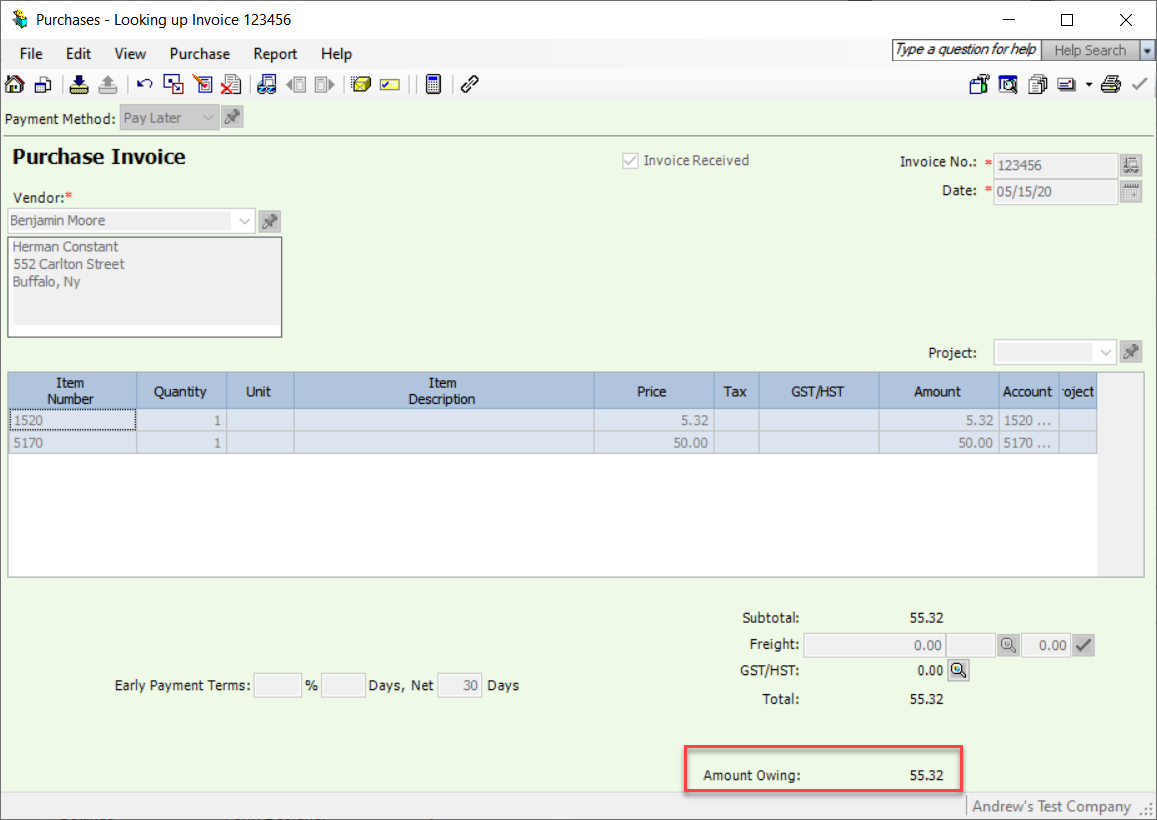
Note: If Tax is required, it will need to be added to each Purchase Order\AP Voucher as a Vendor Footer Charge.
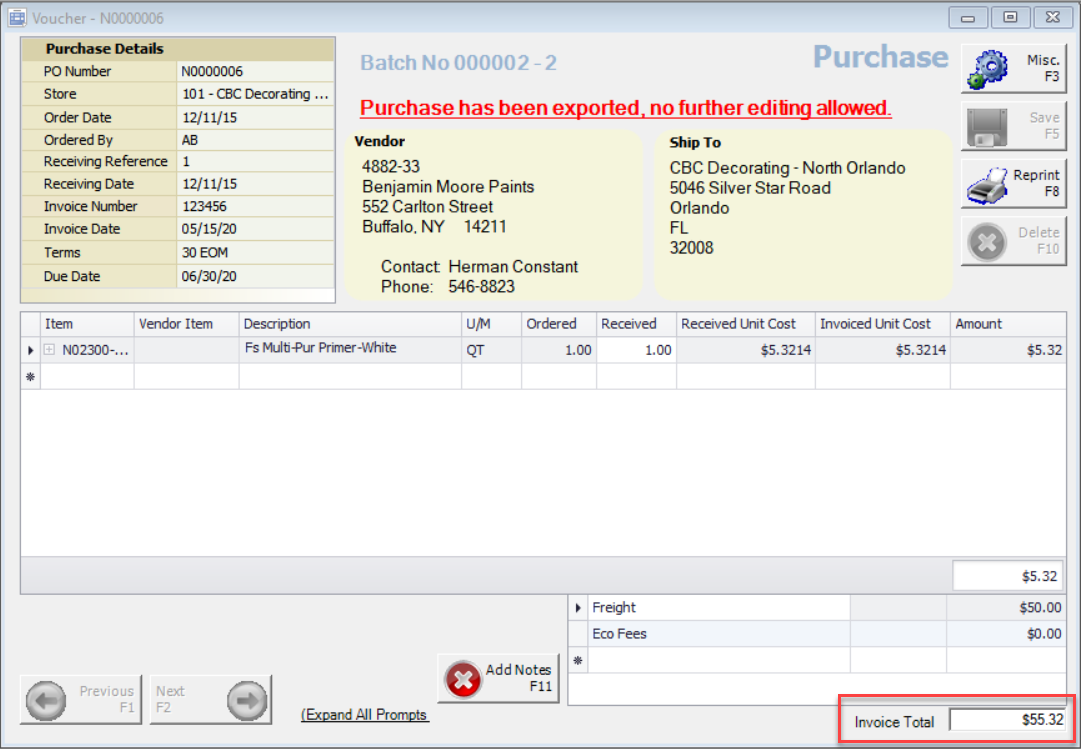
The invoice will look like this in Sage 50: