Overview
This document shows how to complete a physical inventory within Decor Fusion using the Physical Inventory Wizard. A Physical inventory is counted on all regular merchandise, whether stocked or non-stocked. No Sundry Masters and Special Orders should be counted as part of the physical inventory count.
Procedures:
To start a Physical Inventory click on Inventory menu then select Physical Inventory Wizard. Click Set Up For New Physical button.
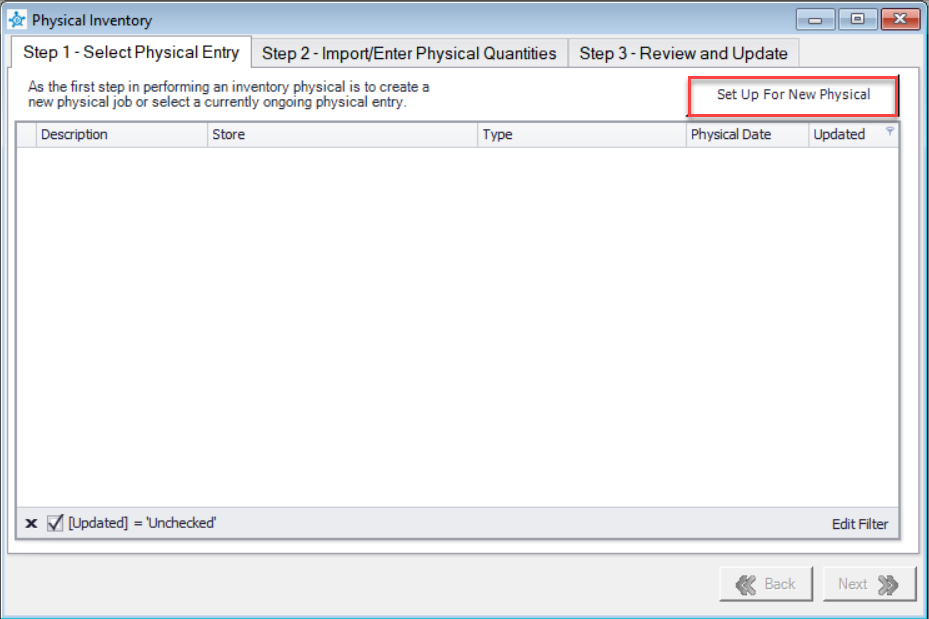
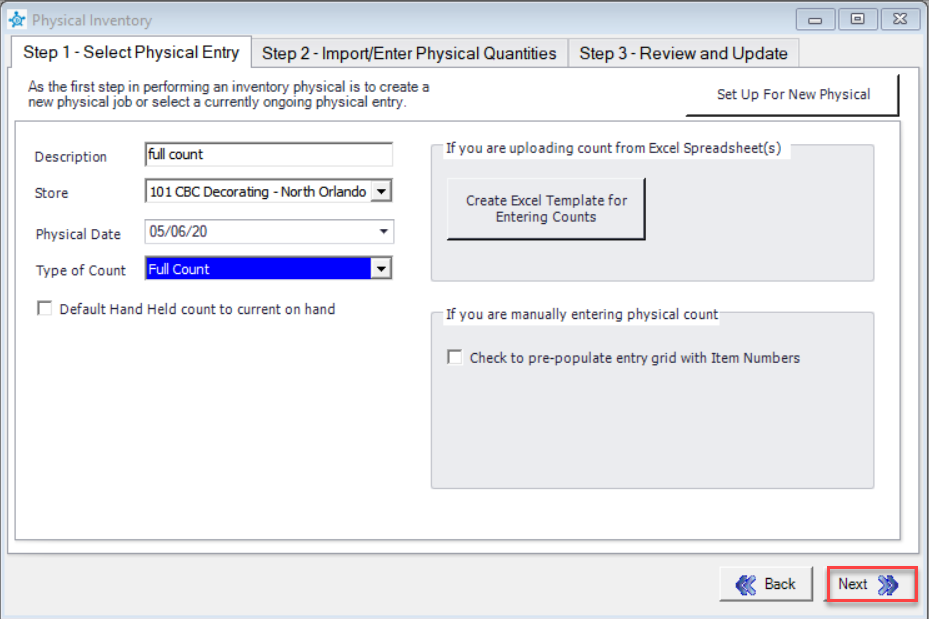
The screen below appears where you will need input all the details of the physical inventory to be performed.
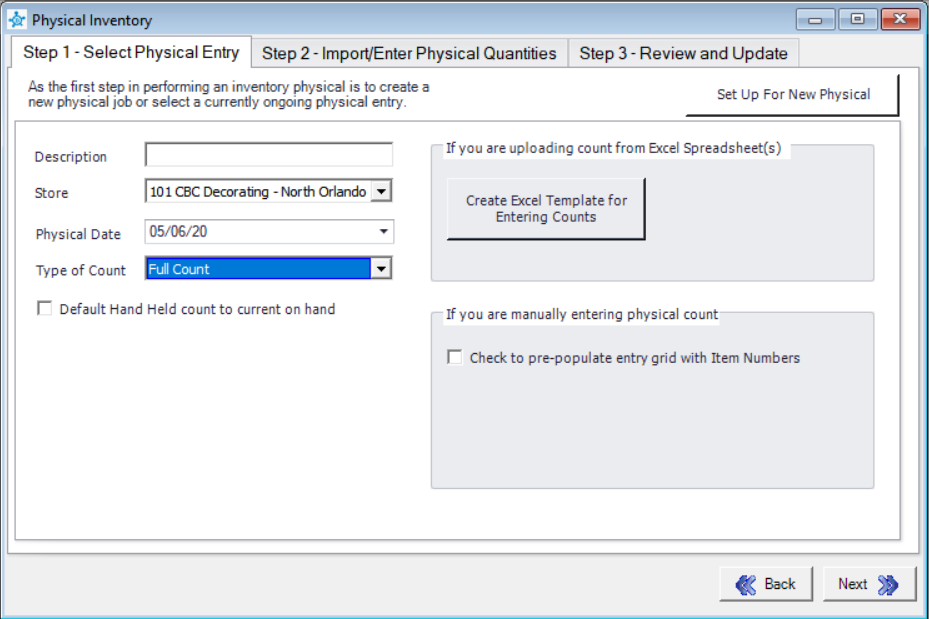
You will need to enter the following:
- A valid Description pertaining to the physical count.
- Select the Store (especially important in a multistore environment).
- Enter the Date the Physical took place on
- The history line will be entered on the date above at 23:59:59 or 11:59:59 PM. This may factor into the date used on the inventory to ensure that the history line is injected accurately on the inventory items.
- Select the Type of Count that is being performed; the options are:
- Cycle Count – allows the count to be based upon criteria such as Department, Fine Line, Class, Inventory Group or Vendor; all items not counted will set the on hand amount to 0.
- Full Count – count is on full inventory; all items not counted will set the on hand amount to 0.
- Spot Check – allows you to check count on a specific area in the store; an items not counted will leave on hand amounts to current value.
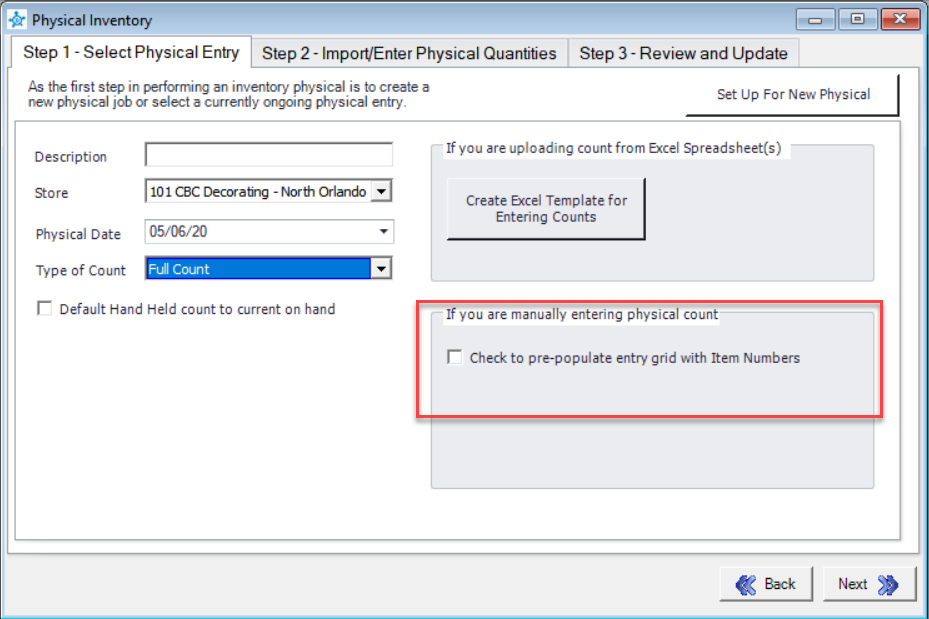
- If you are counting with the Hand held device and you want to set the count to current on hand totals, check the box below Type of Count.
If you are counting the inventory with a laptop and a barcode scanner, click Create Excel Templates for Entering Counts. This will create a spreadsheet which you can scan items into the spreadsheet and then enter the count. The spreadsheet also has a verification system that will notify the user if the item is not in your inventory.

If the count is being done manually, you can elect to Pre-Populate entry grid with Item Number. If this is selected an option because available to Check to default count values to values to system on hand (Control value). This means that it will pre-populate the entry grid with item numbers as well as the count will show as the current control value.
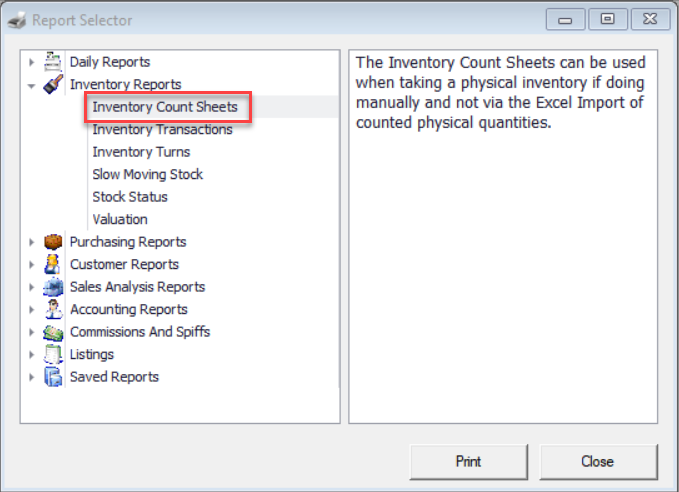
To print an inventory count sheet from Decor Fusion go to Reports menu then select Report Selector. From there expand Inventory Reports and double click Inventory Count Sheets.
Once all details for the Physical Inventory have been entered as needed, click Next.
The physical inventory screen can now be closed.
Upon completing inventory count, click on Inventory menu then select Physical Inventory Wizard. Select the current physical and double click to open it. Please note the default filter for this screen is un-updated physical inventories. In our example we only have a few items counted, you will certainly have many more items.
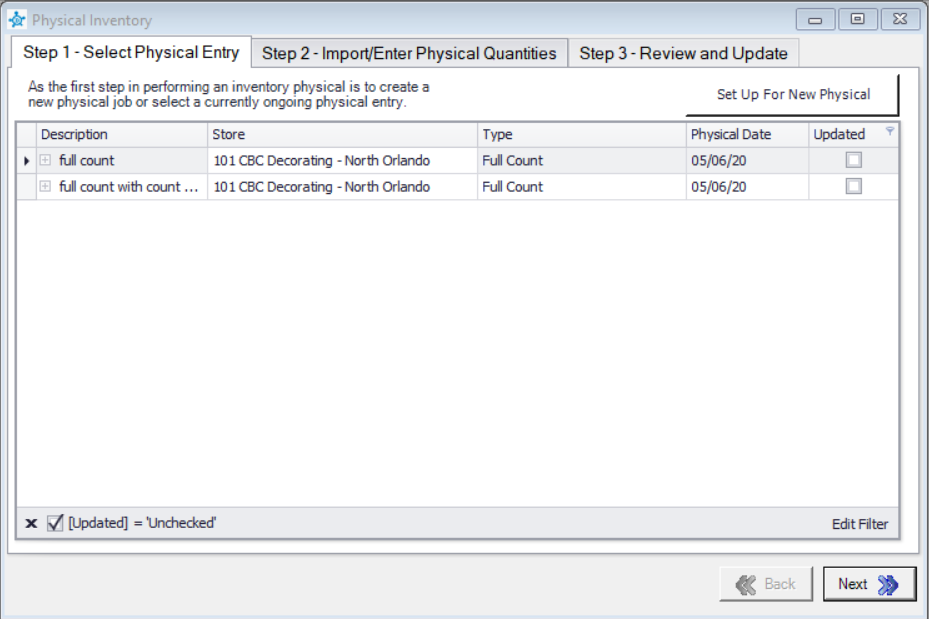
The inventory selected will open on Step 2.
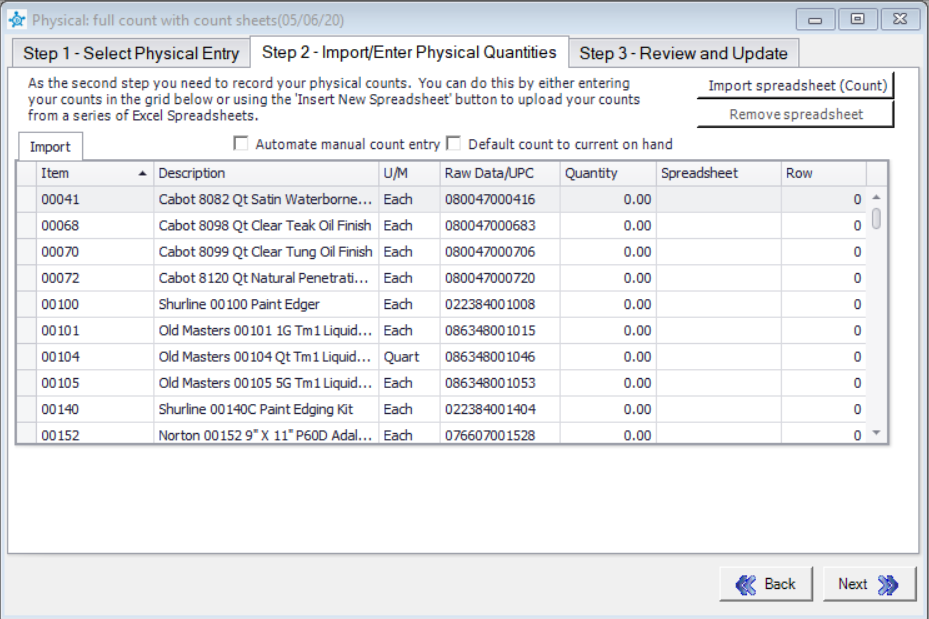
For a manual physical inventory, go through the grid and change the quantity field to match the amounts counted on the count sheets.
If importing a spreadsheet, click the Import spreadsheet (Count) button.
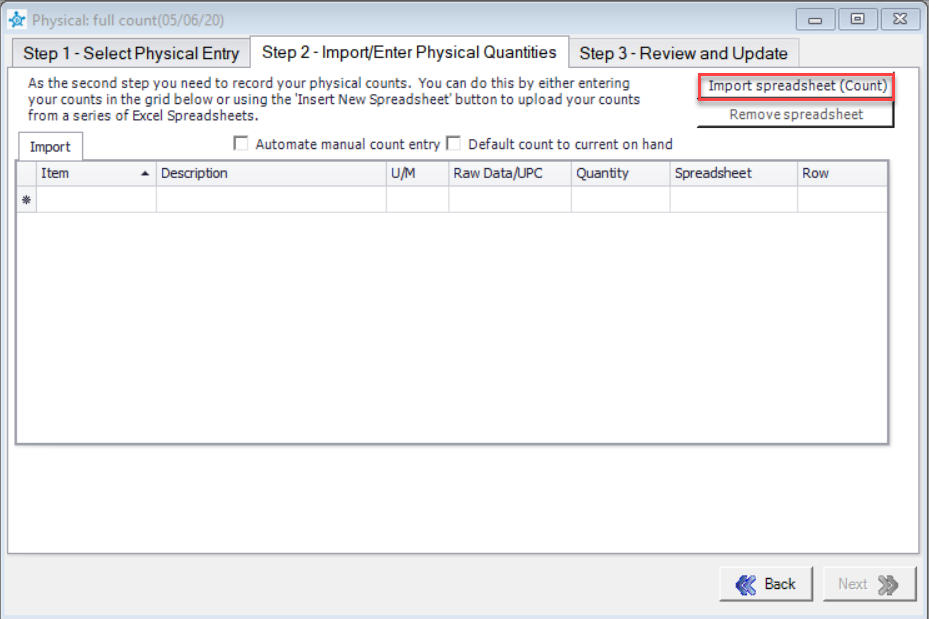
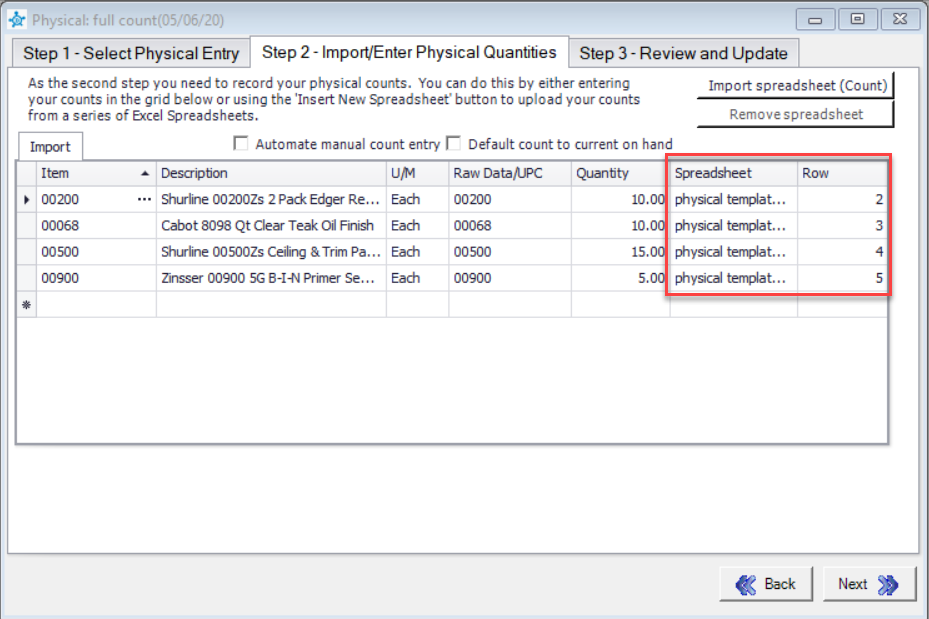
You will be prompted to open the spreadsheet from its saved location. After it is imported, which can take some time depending on the size of your inventory, the column labelled Spreadsheet will be populated with the spreadsheet name. The column labelled Row will have the row number from in the spreadsheet where the item can be found if you need to refer back to the spreadsheet to correct a data entry error for example.
Click the Next button when finished.
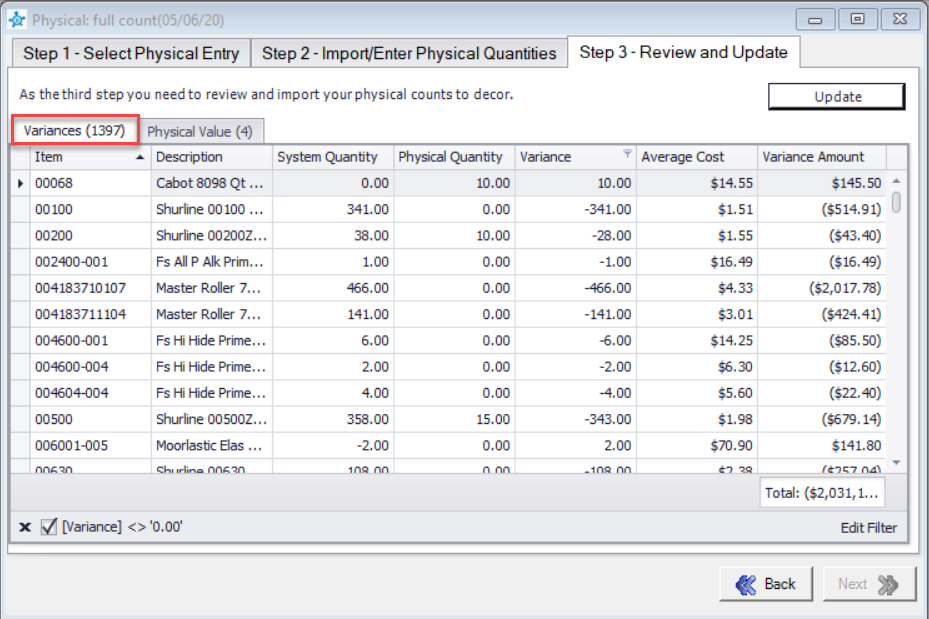
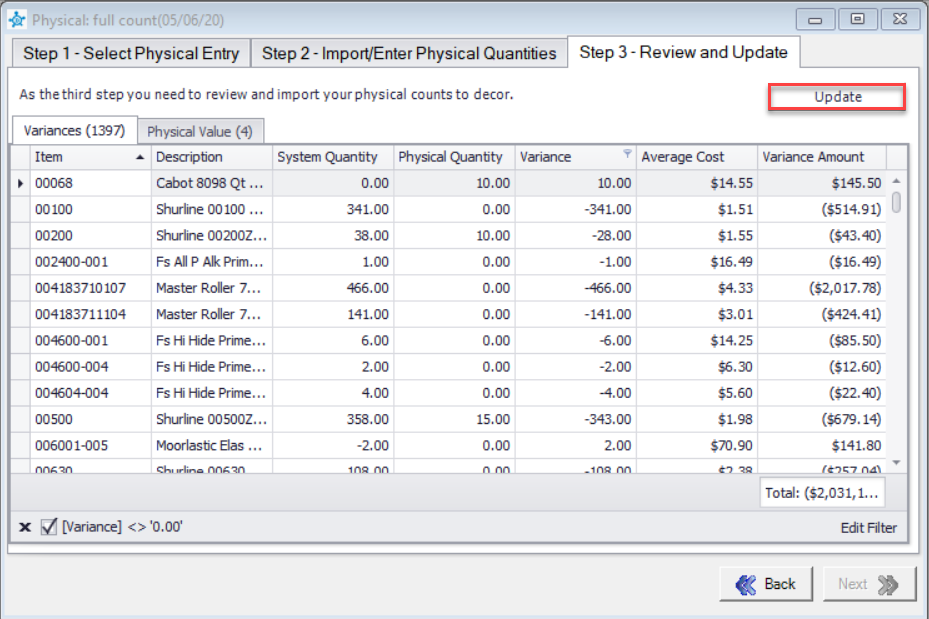
Click the Review button to show all items that have a quantity that is not equal to zero.
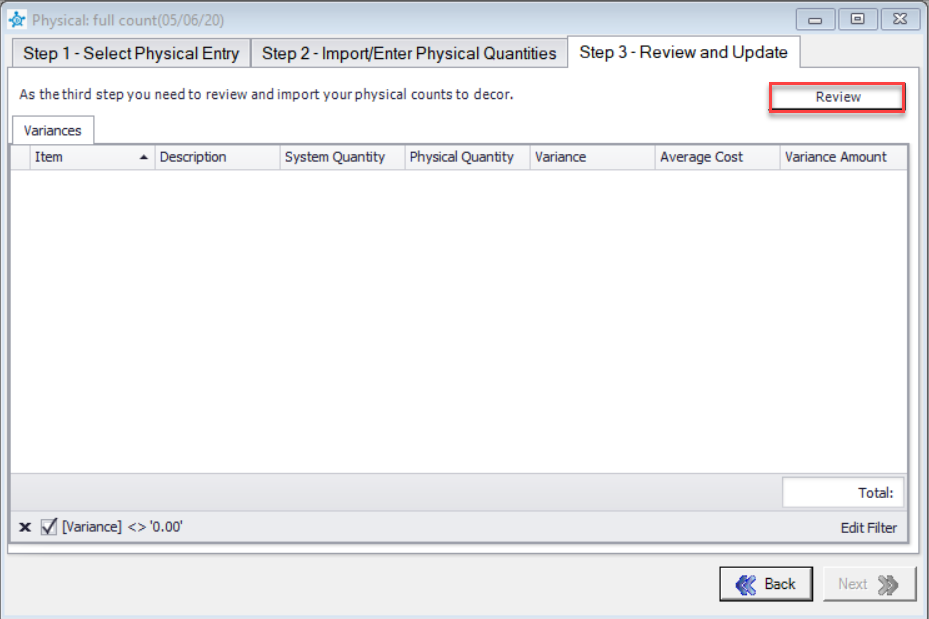
This screen has two tabs that display the Variances and Physical Inventory values. These reports on Valuation and Physical Value will only be seen on the review. Once updated, the reports will no longer be available.
Please note: It is best to export these grids and save these grids so that you can review them later if desired. They will no longer be accessible once the inventory is updated.
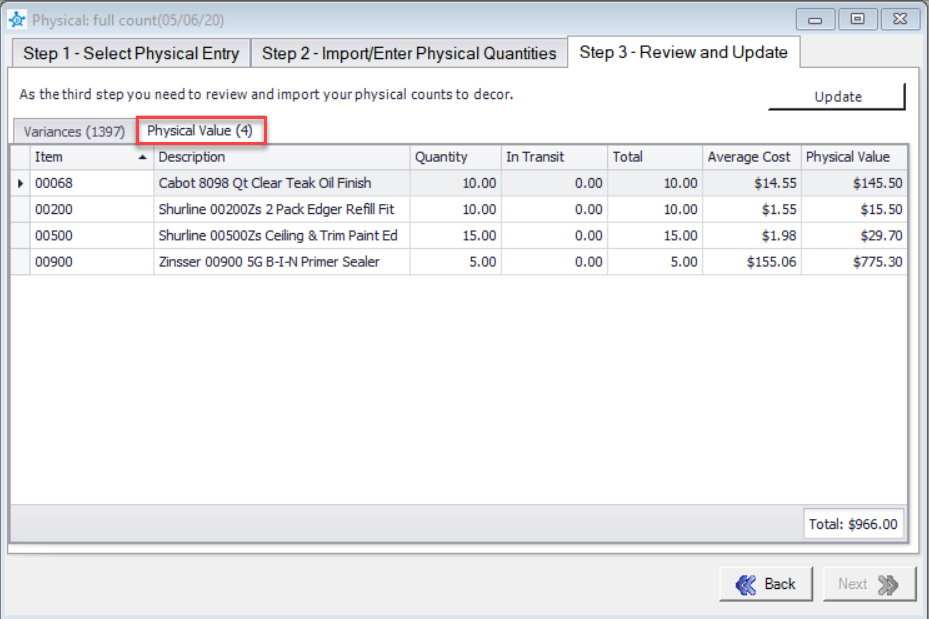
Both of the grids, Variance and Physical Value, work as a traditional Decor Fusion grid where by you can filter on the title rows to narrow down the data being reviewed.
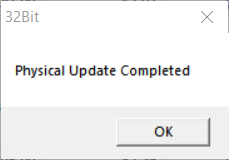
After reviewing your data and you are ready to update the on hand counts, click Update to commit to changes.
“Physical Update Completed” message will display when the physical inventory has updated the database.
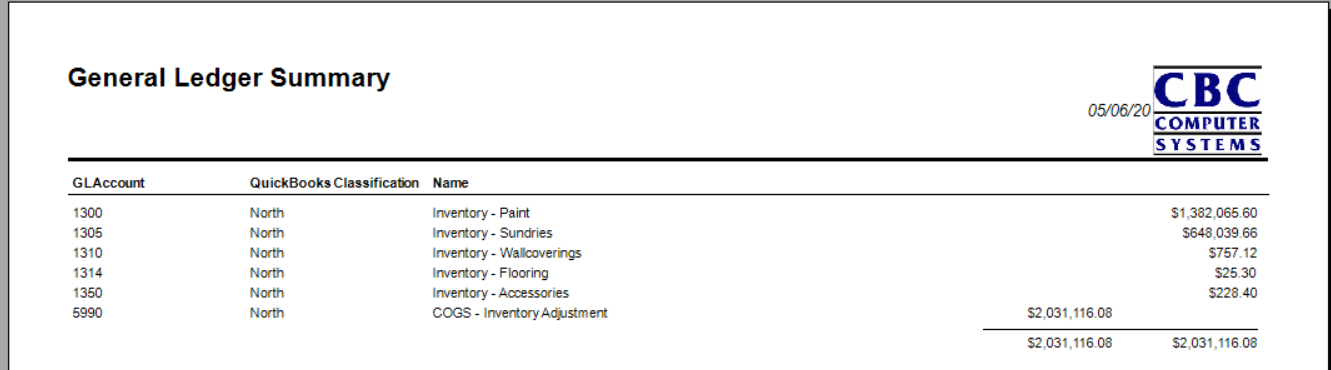
As for reporting, when looking at the variance tab of the physical inventory review, you are able to see line by line the variance amounts, as well as the total variance of the physical. This must be reviewed before updating however.
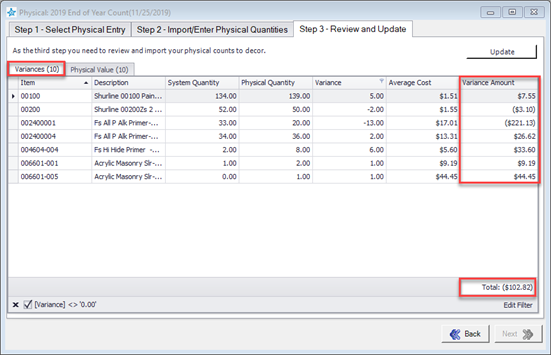
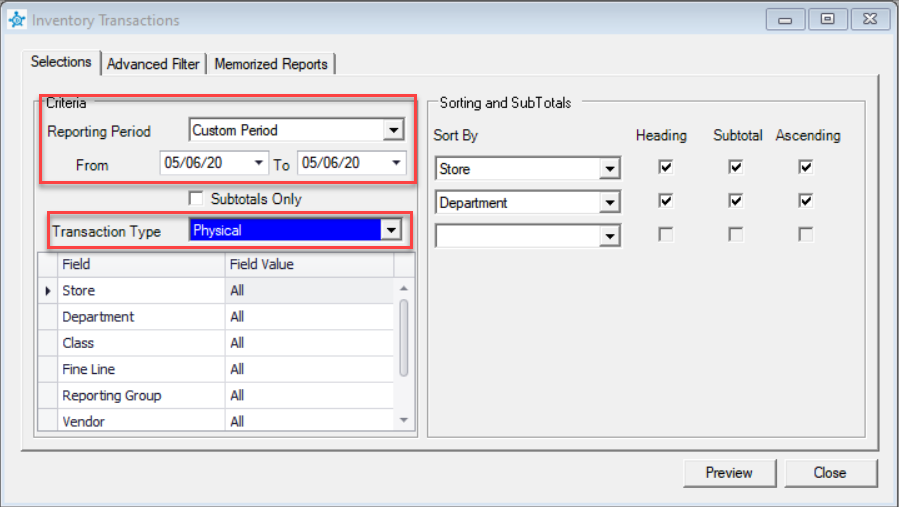
This variance is the total amount that will affect your inventory account adjustments. The transaction can be seen on your reports by opening Reports menu then selecting Report Selector. Then expand the Inventory Reports section and double click Inventory Transactions. When the report selector is opened, ensure you set your dates for the inventory date as well as select the Transaction Type of Physical.
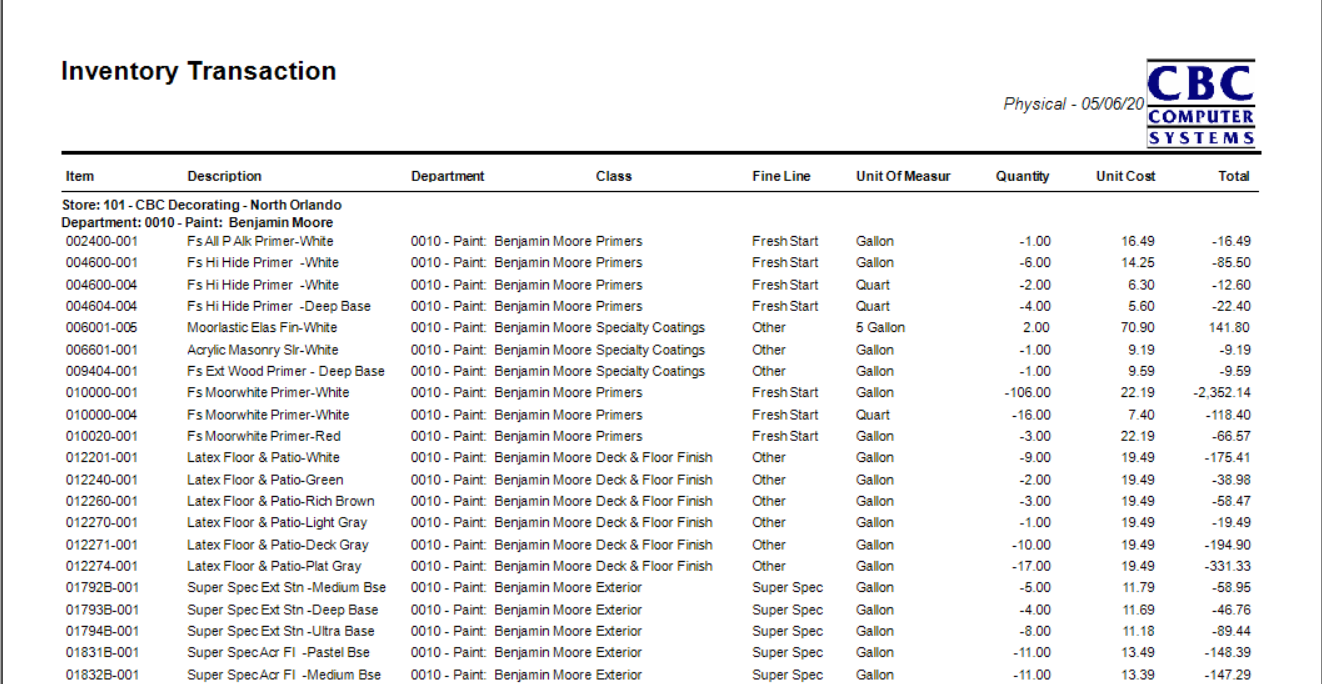
Once previewed, the report will show you in detail each adjustment made to come to the total adjustment noted from the variance tab of the physical itself.
When the General Ledger export is run, the transactions would be included in your report. In this scenario, the Inventory was run on a day the store was closed, so the only transactions are related to the inventory adjustments from the physical. If this was injected a day the store was open for business, the entries would not be as easily visible.